-
Kamakshi S
06th Aug 2013
These days, digital camera can handle videos as well. If your weapon of choice (camera phone, a point and shoot, or DSLR) can give you decent amount of details in the clips, but needs a bit of touch up, free tools such as Virtual Dub or even Windows Live Movie Maker (WLMM) can help. An incredible free editing tool, VirtualDub has a rather steep learning curve, and doesn't support MP4 file formats (which is quite common for smartphone captures). So you have to first convert the format of the video with a tool such as SUPER, which makes the process cumbersome, and shoos away the beginners. WLMM on the other hand is easy to get used to, but doesn't offer a lot of fixes. But then again, you can't expect a free tool do everything with you even breaking into a sweat. That said, here's what you can do with the software, on a PC running Windows 7.
Name It Right
The first thing you need to do is shoot the movie and transfer it to your PC (duh!). Then from the Home tab, load the video via the Add videos and photos option. Then you can create a title plaque for your movie using the Title option. Here you can also set font type and font size for the name you enter, with the Text Tools sub-tab.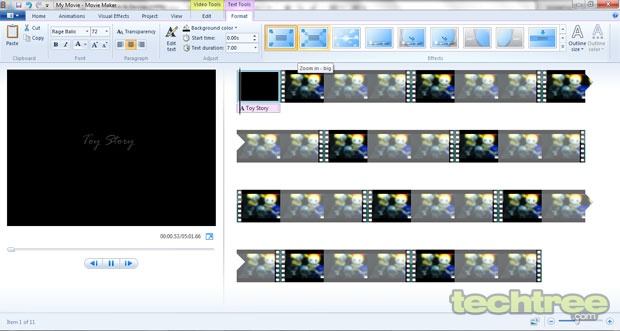
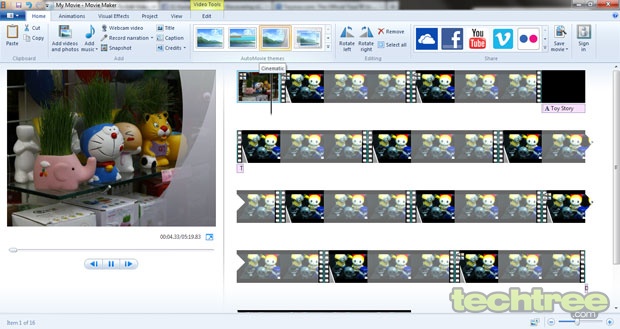
The Video Tools sub-tab helps you blend the title screen with your movie clip, to ensure smooth transition. If you don’t like the effects there, you can come back to the Home tab to pick from some AutoMovie themes. That will also add end credits to your movie. More on that later.
Adding Effects
Now this tool doesn’t let you sharpen videos or eliminate noise. But you can alter the videos brightness settings and add some interesting effects. Go to the Visual Effects tab and pick from interesting effects such as black and white, or a 360degree cinematic spin. Just try not to overdo it though.
Background Music
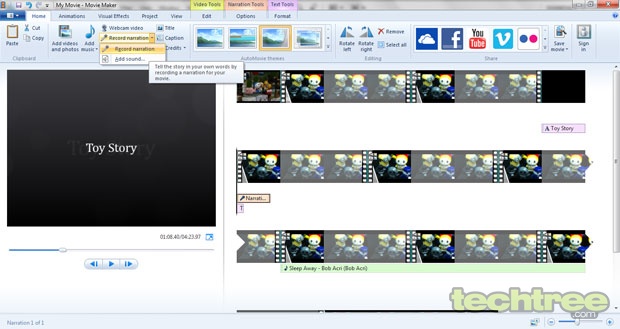
If your camera doesn't capture sounds well, then you can record it separately and sync it with the video. WLMM gives you some handy options with sound - you can flatten/sharpen, fade-in/out sounds, and add narration in real-time. That being said, you can add multiple sound files at different points of your video. To add music, go to the Home tab and click the Add music option. To change sounds mid-way through the video, click the drop-down list in Options, and select the Add music at the current point option.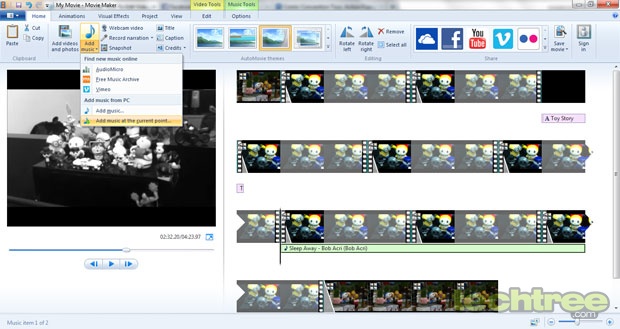
If you don't have the right kind of music, you can even look for multi-media from Vimeo, Free Music Archive, or AudioMicro. To add narrations to your video, connect a microphone to your PC, and hit the Record narration option, and start recording.
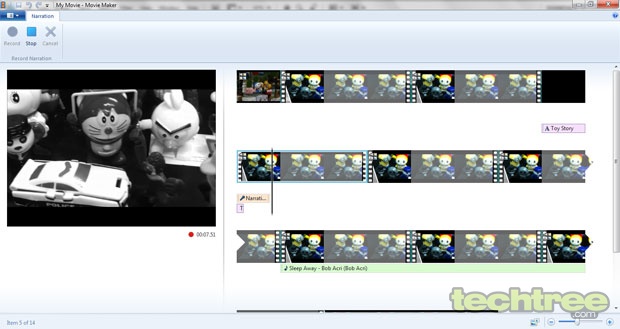
Once you have recorded the narration recorded, use the Add sound option from the drop-down list to sync it to the clip. If the recording is not up to the mark, go to the Project tab to toggle around with the setting listed under the Audio group, or just use the Narration Tools sub-tab to tweak settings a bit.
Ending In Style
Once you movie has come together, you may want to specify details of where the movie has been shot, or any special mentions, you can do so in the end credits. To add credits, go to the Home tab and click the Credits option. Just like the Title, you can add effects and change font details.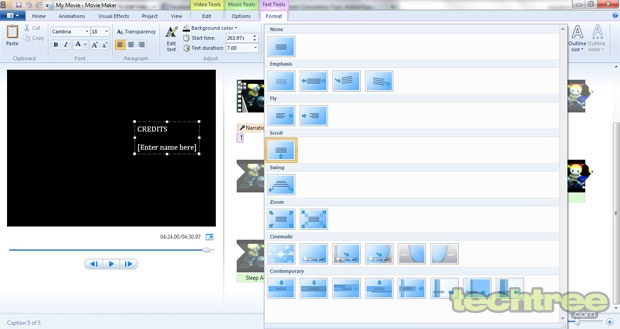
Wrapping It Up
Once your movie is ready, you need to save the final output. Go back to the Home tab, and hit the Save movie button appearing under the Share group. You can directly upload the clip on YouTube, Vimeo, Facebook, or your SkyDrive account right from the application. The software can double up as a video convertor or sorts; it offers compatible format conversions that will work any specific major mobile platform, and that too in a variety of screen resolutions.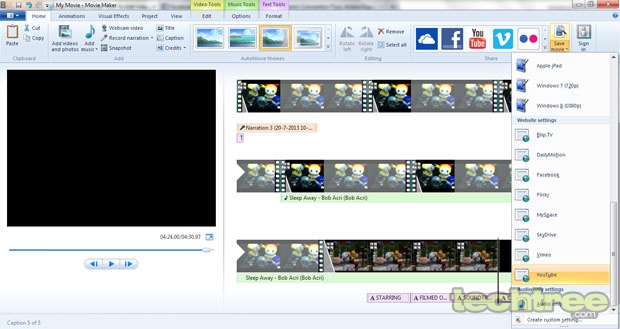
Parting Note:
If you do have a digital or smartphone camera that gives you decent amount of details in an image, but the video quality is not up to the mark, you can stitch images together to create a stop motion film using the software too. However, you will need quite a few memory cards, a steady hand (or a tripod), and a whole lot of patience, as each frame would require you to snap at least 10-15 snaps for smooth transition. The ideal number of images is 24, but anything between 10-15 should work perfectly well. Once you have all your images in a sequence, you can start the compiling process. Just ensure that the gap between two snaps is at the least, or else it will end up looking like a PowerPoint presentation.
Guide: How To Edit Videos With Windows Movie Maker | TechTree.com
Guide: How To Edit Videos With Windows Movie Maker
Create some interesting videos to share with your friends online.
News Corner
- DRIFE Begins Operations in Namma Bengaluru
- Sevenaire launches ‘NEPTUNE’ – 24W Portable Speaker with RGB LED Lights
- Inbase launches ‘Urban Q1 Pro’ TWS Earbuds with Smart Touch control in India
- Airtel announces Rs 6000 cashback on purchase of smartphones from leading brands
- 78% of Indians are saving to spend during the festive season and 72% will splurge on gadgets & electronics
- 5 Tips For Buying A TV This Festive Season
- Facebook launches its largest creator education program in India
- 5 educational tech toys for young and aspiring engineers
- Mid-range smartphones emerge as customer favourites this festive season, reveals Amazon survey
- COLORFUL Launches Onebot M24A1 AIO PC for Professionals


TECHTREE